Ever since I attended my first knap-in, I have felt the itch to start chipping stone. I have collected bottles and broken dishes (thanks to my son) in the hopes of staring in on this new skill. However, I didn’t have any cash-in-hand with which to buy some tools. I scoured the internet and talked to local knappers to get information on making tools, and figured out what I needed to do. So this past weekend, I did some shopping and gathered everything I thought I would need to make some copper boppers. Essentially, you need some copper end caps (the kind plumbers use), something to round out the caps (I tried a variety of methods including a ball-peen hammer, a carriage bolt and a screw), some dowel rods for the handles, lead to fill the caps, a way to melt the lead, and some epoxy (not pictured) to hold the caps onto the handles.
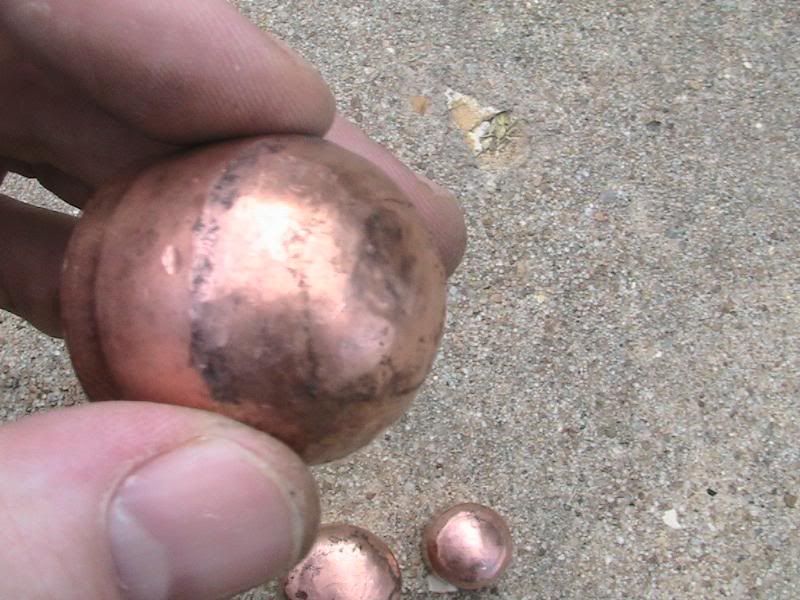
 I had to shop around to find the copper caps. The big-box hardware stores really let me down, having a paltry selection. So I hit some of the local, small-time stores and found some very helpful store owners with the supplies I needed. I got a 1/2″ cap, a 3/4″ cap and a couple of 1″ caps. The less-than-one-inch sizes may sound pretty tiny, but I figured I would end up working a lot of glass until I can find or buy some stone, so I wanted a couple of really small boppers for working smaller material.I found the ball-peen hammer on sale in the clearance bin at one of the hardware stores where I also bought the carriage bolt and the screw (both with rounded ends).
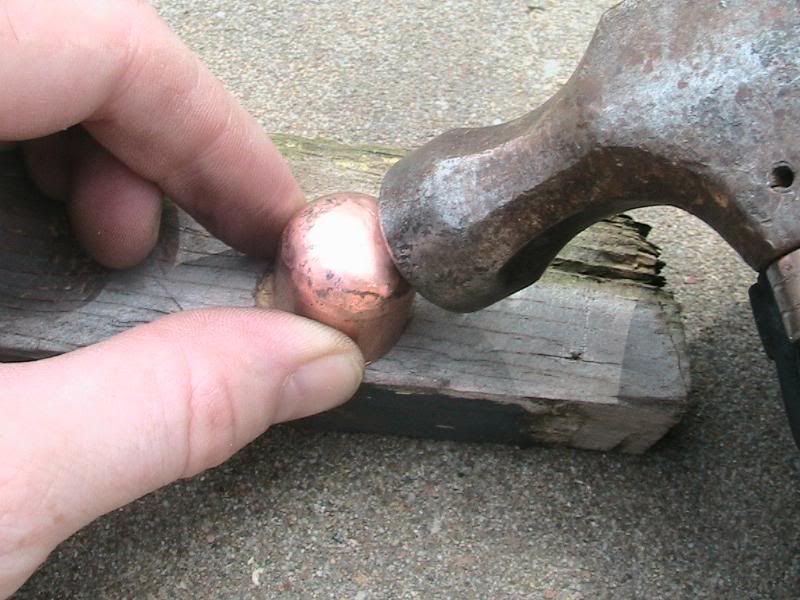
 The cast iron skillet I used to melt the lead, I found at a thrift store. The lead I bought at Wal-Mart. I tried to get the heaviest fishing weights I could find for the cheapest amount. You could probably get free lead if you went to an auto garage or some place that they work on tires and found some discarded tire weights, but as I got the wild hair to do this project this weekend I had to skimp on time.I had originally planned to make the handles out of willow since I have plenty of that laying around. But, again with the time constraints in mind, I bought some oak dowel rods at Lowes.So now that I had gathered all my supplies, I got started actually making the boppers.You could use the copper caps in the square-ended, cylindrical state in which they come. Some knappers I have read about even use copper hammers, which also have squared ends (like a typical hammer.) However, the rounded shape seems to give you a better surface for striking your platforms on the stone, as you have to worry less about the angle of your bopper and can concentrate more on the angle of your stone.I have read about a few different methods for rounding out your boppers caps, so I thought I would give a few of them a try. Most sources indicated to put a ball-peen hammer in a table vice with the ball end up, slip the cap over the ball end of the hammer and use a second hammer to tap a rounded shape into the copper. This method worked really well for me except for the fact that the tiny little table vise I own (seen holding the ball-peen hammer in the very first picture in this post) didn’t really help me. A heavy-duty vise, bolted to a work bench, however, would probably work well. I ended up, just abutting the hammer handle against the wall as a brace and holding the hammer upright on the front porch in order to round the caps. It didn’t work as easy as just slipping the cap on and hammering it straight over the ball-peen hammer end, though. I had to tilt the cap and constantly turn it around the hammer ball so that the curve of the ball-peen supported the different parts of the cap that I wanted to hammer out. By moving it around, however, I got a really nice rounded shape on my two 1″ caps.
 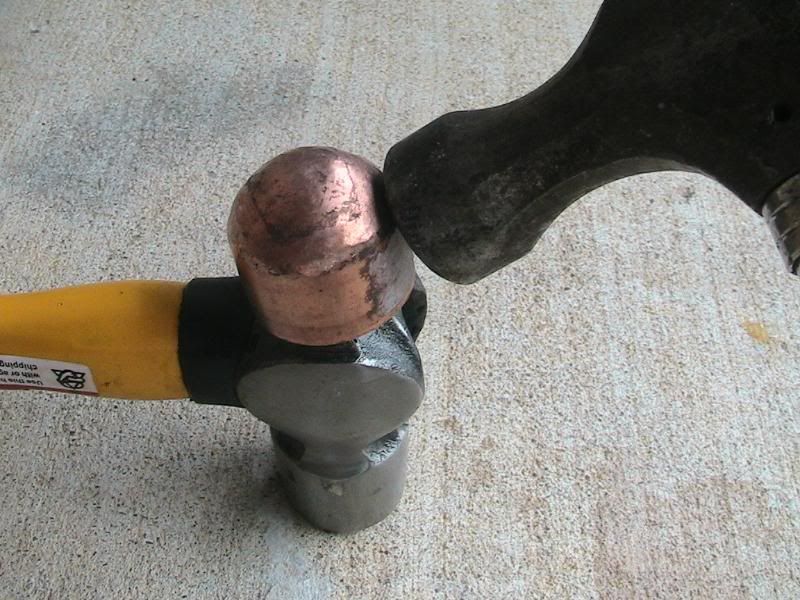  |
| Abut the hammer against a wall (left) to brace it with the ball end up. Hammer the cap on the ball end (middle) turning and tilting the cap as necessary in order to round out the shape (right). |
I didn’t have a ball-peen hammer small enough for the 3/4″ and 1/2″ caps so I had to try an alternate method for them. Another source I read suggested using a carriage bolt. They said to insert the bolt head into the cap and hammer down onto a 2×4 piece of wood so that the pressure of the hammering would push a bulge into the cap. The wood provides minimal resistance and also gives way to the bulging shape of the curve you hammer into the cap. This didn’t work nearly as well as the ball-peen hammer method for me. The bolt seemed to want to just bell a dome up out of the middle of the cap top and leave the square edges of the cap the same. Since I wanted a better curve to my caps than that, I had to do some improvising. I found that simply holding the cap down on the board with the closed end up and hammering at an angle on the square edges of the cap top helped to round them out. I rounded out the edges even more by turning the cap on its side and hammering that way as well.
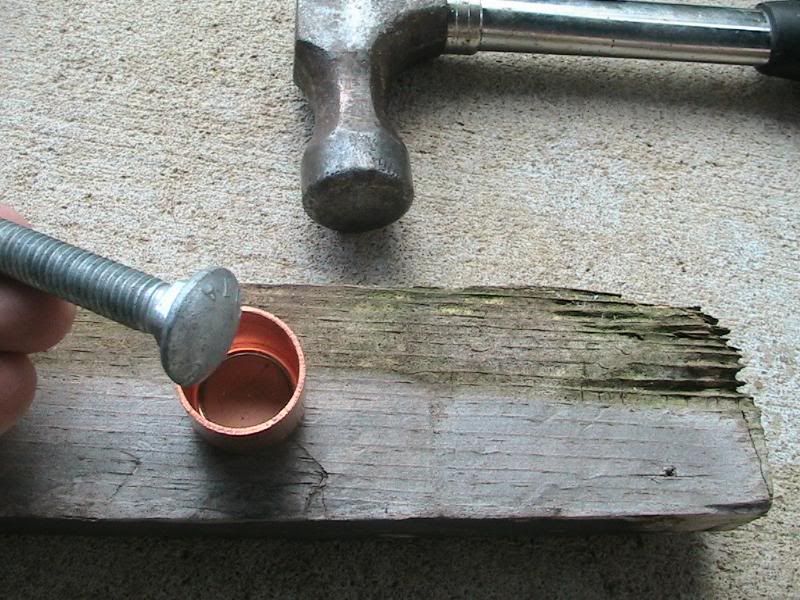 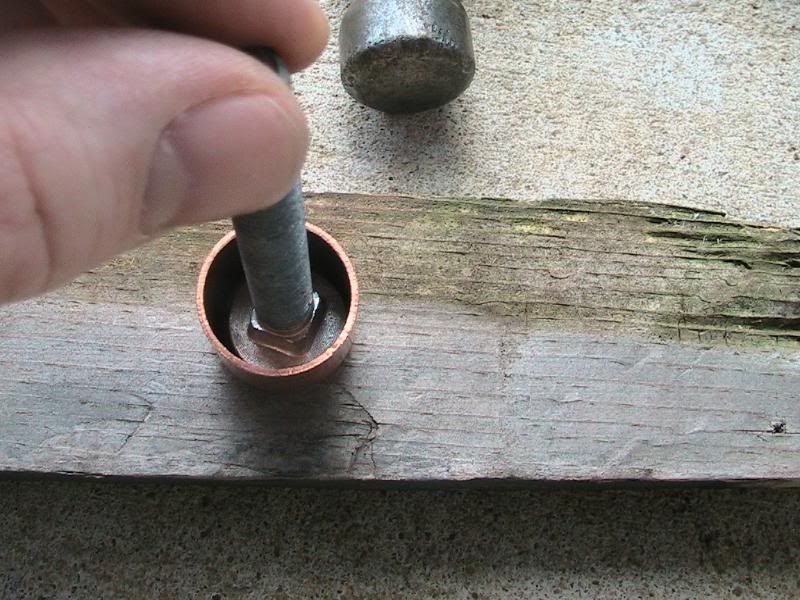  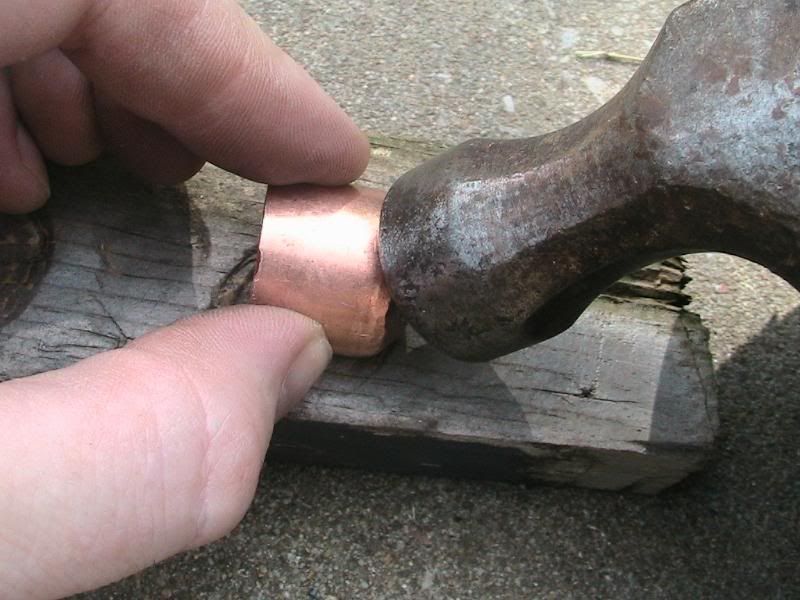 |
| Use a carriage bolt to hammer a dome into the top of the cap (left two images), then hammer the outside edges of the cap to round them more (right two images). |
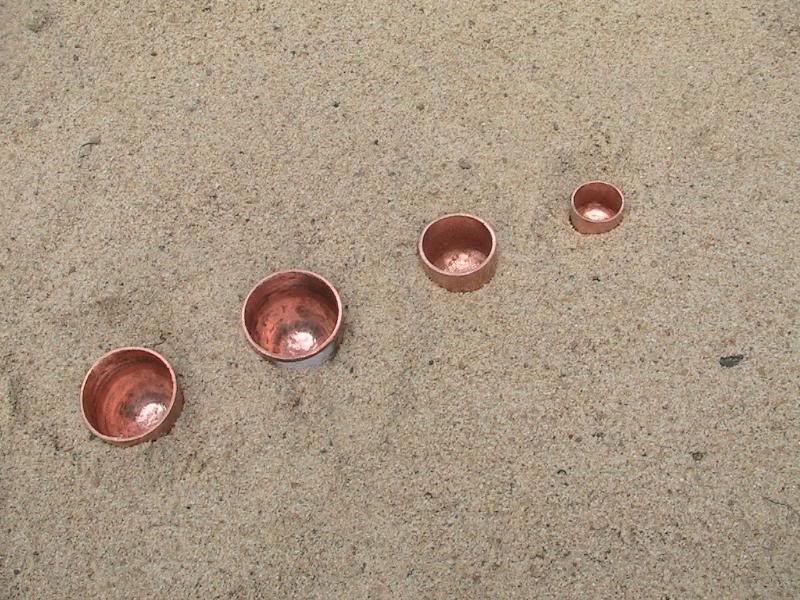
I couldn’t find a carriage bolt small enough to fit in my 1/2″ cap, so I used a screw with a rounded head in the same way. By hammering the outside edge on this cap like I did on the 3/4″ cap, I got a decent curve to the top. The smaller caps didn’t get nearly as good of a rounding on them as the 1″ caps did, but I think I definitely made an improvement over the untouched squared shapes. After I had rounded out my caps, I needed to fill them with lead to give them weight. I dumped a couple packages of fish weights into my cast iron skillet and put it on my grill outside to melt. You want to melt your lead in a really well-ventilated area (outside if possible) because lead emits toxic fumes when it melts.I set the copper caps into a tray of sand with the open ends up. This allowed the caps to stay upright as I poured the lead (as they would get too hot to hold) and made cleaning up any spilled lead relatively easy. Once the lead melted, I poured it into the caps, filling them 2/3 to 3/4 of the way full and left them in the sand to cool.
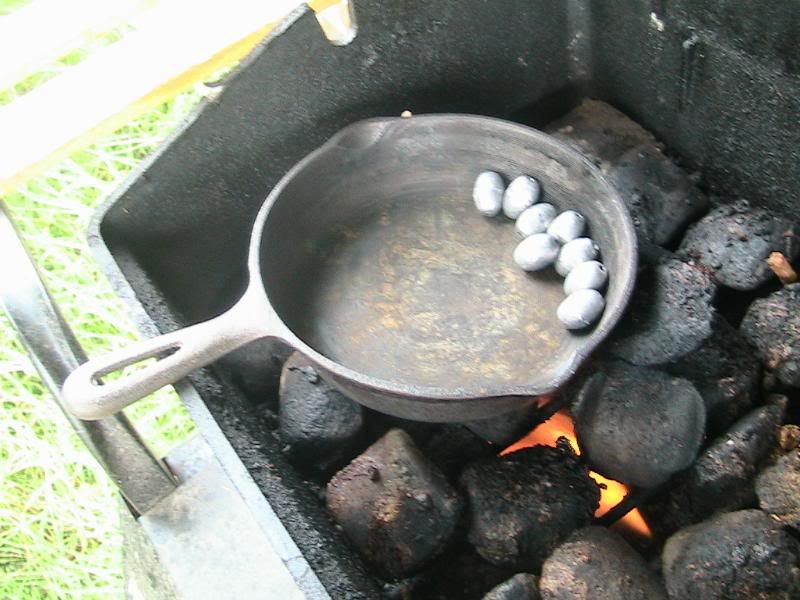  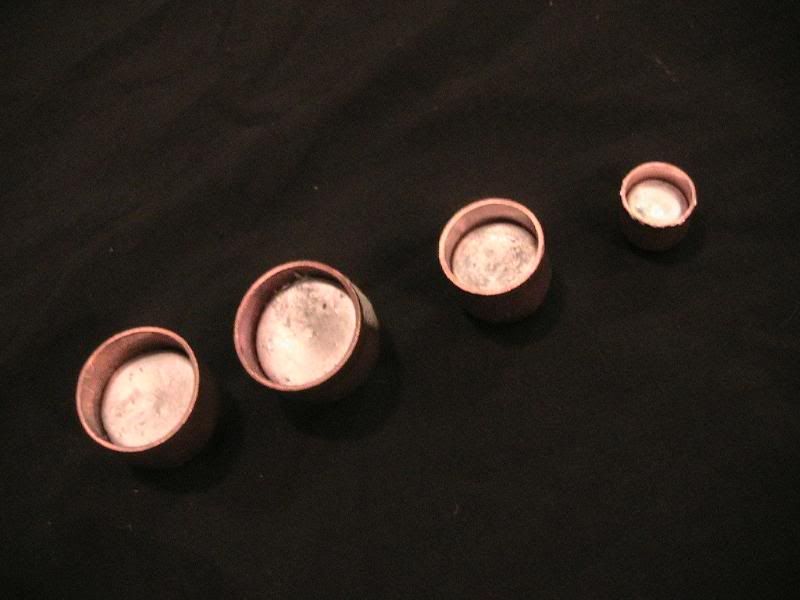 |
| Melt the lead in a well-ventilated area (left). Set the caps in sand with the open end up to pour the lead into (middle). Fill the caps 2/3 to 3/4 of the way full and let cool before removing from the sand (right). |
After the caps cooled to the touch, I made the handles. I figured that a 1″ cap would fit nicely on a 1″ dowel rod, but that didn’t work. It turns out that the 3/4″ cap had about the same outside diameter as a 1″ dowel rod, and a 1/2″ cap had a little less than the same diameter as a 3/4″ dowel rod. This meant that I had handle material for my two small caps, but the two 1″ caps would have to wait. I measured the depth of the caps now that they had lead in them and whittled down the rods to allow the caps to slide over them. Once I had reduced the rod diameters enough to get the caps on, I cut the handles to a manageable size and glued the caps onto them using 5 minute epoxy. I set them upright in the sand to dry, and once the epoxy finished setting, I had a couple of great little boppers.
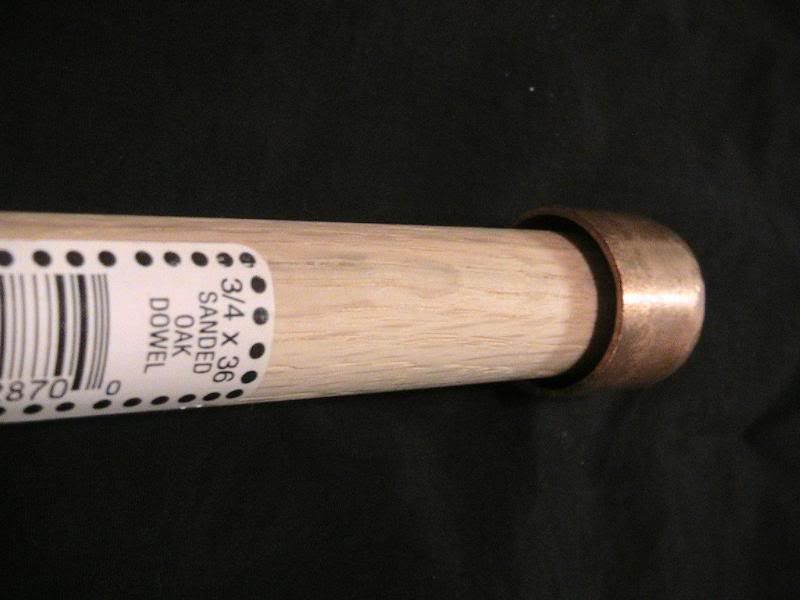    |
| A 3/4″ dowel rod’s outside diameter does not match the inside diameter of a 3/4″ copper cap (left). Whittle the ends of a 1/4″ size larger rod for each cap (middle left) and fit the caps on the ends of the dowel rods (middle right). Coat the whittled ends of the rods with 5 minute epoxy to seal the caps onto their handles (right). |
So, how much did I save by making my own tools over buying commercial boppers? Probably quite a bit. I think even with buying a hammer and a skillet, everything came to less than $25 for four boppers, where as a single 1″ commercial bopper would have probably cost me somewhere between $10 and $15 dollars. Mind you, Missouri Trading Company’s Warren boppers come with a lifetime guarantee on the body, and they designed them for easy head changes. But if you like the DIY route or if you want to save money, it doesn’t take much to make some boppers on your own.Maybe someday I can get ahold of some antler material to make some primitive percussion and flaking tools, but until then, I have the beginnings of a good copper percussion set.Since my friend Hope gave me some nice leather, now I just need to make some pressure flakers, and I will have everything I need for the next JOMO knap-in up in Missouri.


Posted by Alan Post on 09/28/2007 at 3:12 pm
after reading this, i’m still left wondering exactly what a copper bopper does. :(
Posted by Rix on 09/28/2007 at 3:22 pm
I apologize, Alan. I hoped that the links in the first paragraph would have help you trace the breadcrumb trail from the previous posts discussing making flintknapping tools, namely Taking a knap and Cheap tools for flintknapping tools. Also, I tried to load the tags on this post with indicators about flintknapping. But generally, I did presuppose a familiarity with the concept on the readers’ part.
In a nutshell, one uses a copper bopper to chip flakes off of a stone like chert, flint or obsidian in order to make stone tools like arrowheads, spear tips and knives. The process of successfully using a copper bopper requires a better knowledge of flintknapping than I have yet obtained. Check out the Knapping page at the REWILD.info Field Guide for an overview of flintknapping terms and techniques.
Posted by Mesa Mike on 10/01/2007 at 3:43 pm
Hi,
I just bought some copper caps and some dowels today at my local Do It Best hardware store.
What I found is that you should get your dowels an eight inch larger than your copper caps. For example, a 1″ cap fits great onto a 1-1/8″ dowel, 7/8 ” dowel for a 3/4′ cap, and a 5/8″ dowel for the 1/2″ cap.
Posted by Rix on 10/01/2007 at 3:51 pm
Thanks for the info, Mike.
I found the 1/8th inch difference worked on my one inch caps when I went back to buy new dowels, but I didn’t think about checking the smaller size caps for the 1/8th inch difference.
Now if I could just find some larger caps, I would really like to have a 1 1/4 inch bopper.
Posted by Urban Scout on 10/02/2007 at 12:23 am
Dude. Nice article. Great pictures. Let us know how they work out!
Posted by Rix on 10/02/2007 at 7:46 am
Thanks, Scout.
I tried them out some this weekend on a busted toilet tank lid, and they work really well. The “johnstone” doesn’t knap as easily as the chert I worked on before, but I had fun trying to get to know the feel of how the conchoidal fractures work.
I can’t wait to try them out on some decent stone when I go to the monthly knap-in in Missouri this weekend.
Posted by Mesa Mike on 10/04/2007 at 3:42 pm
Well, I made my boppers, but they didn’t work out so well for me.
After just a little pounding on some porcelain, the heads would pop off. Apparently the epoxy just won’t stand up to the stress. Or I’m not suppose to bop so hard. Not sure which.
I got to thinking about it, and asked myself why did the handle need to be made from a wooden dowel? Why not just use a piece of copper pipe for the handle? I think I’ll just silver-solder some copper pipe onto my caps for a handle and see how that works. It should be more durable.
In the meantime, I am practicing pressure flaking on some beer bottle bottoms, using a flaker I made from some 2 AWG copper wire inserted into the end of a dowel. It works pretty sweet, but then glass isn’t near as tough as porcelain.
Posted by Rix on 10/04/2007 at 3:55 pm
Sorry to hear about your bopping blues, Mesa Mike. When I tried mine out, I bashed some porcelain pretty hard and had no problems. Perhaps you didn’t mix the epoxy well enough or didn’t leave enough headroom when you filled the caps with lead?
I have heard of folks using caps soldered onto pipe. The main complaint I read about with that came down to the fact that they slipped out of your hands easier and that they would discolor your hands — both of which you could easily remedy with some kind of grip like tape or leather wrapping on your pipe handles.
Good luck, and let me know how your soldered boppers turn out.
Posted by Mark on 10/09/2007 at 9:53 pm
Do you need antlers?
Posted by Rix on 10/10/2007 at 7:48 am
I would love some antlers, Mark (Hartness?).
I think Urban Scout is about to send me some, but if you have some that aren’t too weathered, hold on to them. If you are the Mark I think you are, bring them up with you next time you’re in town, and maybe we can fashion them into billets and pressure flakers while we fish. Then you can empty some beer bottles for me so I can knap the bottoms into arrowheads.
Posted by Alan Post on 10/10/2007 at 10:56 am
rix, thanks for adding that context for me. i did link surf a bit, and was going to guess that they were for flint knapping, but most of the sites seemed to start right in the middle–or i was impatient!
this is really a fantastic howto on making these. i’ve recently been thinking about making a blowgun; which might be the kind of thing that would get me into trying something like this.
Posted by Rix on 10/10/2007 at 12:17 pm
Thanks, Alan.
Let me know how your blowgun turns out. It sounds like a fun project.
Posted by Tina Driskell on 09/29/2011 at 2:00 pm
I’m in the process of making some blow darts for my blow gun. Let me know how your project works out. Boppers are on the ToDo list right after I finish my rivercane quiver. My computer geek husband just shakes his head at us. :-)